Showing posts with label Xperia Tipo. Show all posts

Sunday, 1 December 2013

, , , , , ,

XPERIA NEXUS ULTIMATE ROM FOR XPERIA [J/MIRO/TIPO/E-DUAL]


This ROM is built to take performance and stability to a new level. It is named as Xperia Nexus because this rom aims at bringing the ultimate Nexus experience on our Xperia phones. Overall this rom provide a complete balance between looks and performance..


FEATURES

  • Pure Vanilla experience.. [cm10 based]
  • Buttery smoothness of jellybean..
  • Pre-rooted with Superuser app and binaries..
  • New Bootanimation from S4 Google play version..
  • AOSP(JB 4.2.2) Keyboard ( Latin_Ime )
  • Entire Nexus 4 sounds ( alarms, ui, notifications, ringtones etc.)
  • AOSP SystemUI (Notification Bar !)
  • AOSP On-screen buttons(optional--Ask if you need it,not included in zip)...
  • Latest Adreano Drivers.

Download from here


INSTRUCTIONS

For Miro/Tipo/J:
  1. Flash the kernel ! (if you're not on cm10 ROM)
  2. Flash the ROM..
  3. Wipe data and factory reset..
  4. Let it boot first... than reboot to recovery & flash gapps..
  5. Wipe cache and reboot !

For E-Dual:
  1. If you don't have stock JB installed (11.3.A.2.1), you need to flash that firstbecause this ROM only works with the baseband firmware that gets flashed with the stock JB ROM. GSM will be unavailable if you're coming from ICS.
  2. Flash a recovery if you don't have one, e.g. CWM, or the boot.img (TWRP) included in the ROM's .zip.
  3. Boot to recovery and...
  4. Wipe data+caches
  5. Install the ROM .zip
  6. Optionally install GApps

SCREENSHOTS


Publisher: Unknown - 22:46

Thursday, 28 November 2013

, , , , ,

XPERIA Z FIRE ROM FOR XPERIA [J/MIRO/TIPO]


FEATURES

- Based On FXP 234 (STABLE) Jelly Bean 4.1.2
- Based On Super Jelly Bean (CM10 Base)
- Blazing fast, super stable and great battery life
- Busybox included, deodexed and prerooted
- Full INIT.D & CWM support
- Project Butter
- Complete Framework Mod with Xperia Z Design, Framework and many more
- Updated Icons and User Interface
- Xperia ZU Bootanimation,Xperia ZU Sounds,Xperia Z Lock Screen.
- Xperia Z Theme
- 100% Bloatware-Free
- Xperia Z U(Honami) Walkman
- Working Clear Audio+,Sony Equalizer.
- Xperia Z U(Honami) Album & Movies
- Xperia Z U(Honami) Fonts
- Xperia Z U(Honami) Keyboard
- Xperia Honami Launcher With Widgets
- Adreno GPU Drivers
- Xperia Timescape
- Working TrackID,Sony Select,etc


DOWNLOAD

here

INSTRUCTIONS

  1. Download rom
  2. Place rom on your sd card
  3. Make backup of your previous rom
  4. (IF J Flash boot.img from ROM ZIP)Boot to CWM (Volume Down button)
  5. Make full wipe
  6. Wipe cache and dalvik cache
  7. Install the rom
  8. Reboot
  9. Wait for the rom to boot completely
  10. Go Back To CWM Flash The HOT FIX (MUST) and then reboot
  11. --------------------For Xperia Z Ultra (Honami) Apps And UI--------------------
  12. Open Walkman First,then go back to cwm again.
  13. Flash The Honami Transformation Pack.
  14. Reboot ..if it asks sim inlock code just discard it and its done

SCREENSHOTS


Publisher: Unknown - 21:24

Monday, 12 August 2013

, , ,

CWM FOR XPERIA [MIRO/TIPO/TIPO DUAL]


REQUIREMENTS

1.Download the required file


2.Enable USB Debugging


INSTRUCTIONS
  1. Download the requred file
  2. Extract It
  3. Connect you phone in usb debugging mode to pc
  4. Windows users double click install.bat
  5. Linux users use terminal to run install.sh

HOW TO ENTER IN CWM MODE
  1. Power off (for few version less than 11.0.A.4.22 will need to connect charger. Others need not connect 
  2. Power on. When you see the Sony logo press volume down button repeatedly.
  3. Now you should be in cwm recovery


Congratzzzz you have installed CWM in your device!!!!!!!!!!!!!!!!
Publisher: Unknown - 03:21
, ,

HOW TO RELOCK BOOTLOADER ON TIPO


Here is an  easy way to Relock the bootloader


REQUIREMENTS


INSTRUCTIONS

Just extract the file you downloaded earlier and flash it 


Congratzzz you have relocked your bootloader!!!!!!!!!!!!!!
Publisher: Unknown - 02:46

Friday, 19 July 2013

, , , , ,

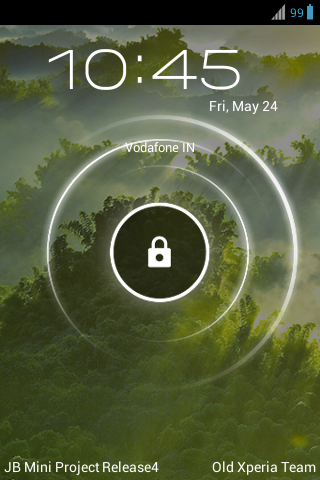
JB MINI ROM FOR [J/MIRO/TIPO]


FEATURES
  • Android 4.1.2
  • Based on CyanogenMod10 FXP 226 (hell lot modded) for miro, and for j & tipo it is FXP 226
  • Power Widget Toggles on Notification Bar (Can be disabled)
  • Performance Settings
  • Fast and Smooth like "Butter"
  • Colored settings icons
  • Good Battery Life
  • Walkman,Xperia T Icons
  • JB Mini Extra Settings
  • Navigation Bar
  • Sense 4 style recent apps
  • Ability to change lockscreen style: Stock, Galaxy S3,BlackBerry Z10,Rotary Slide,Xperia S,HTC Sense,Etc
  • Back/Menu button end call
  • Pick up to call (WIP)
  • Center Clock on statusbar
  • JBMP theme

REQUIREMENTS


INSTRUCTIONS

  1. Download rom
  2. Place rom on your sd card
  3. Make backup of your previous rom
  4. Boot to CWM (Volume Down button)
  5. Make full wipe
  6. Wipe cache and dalvik cache
  7. Install the rom
  8. Install the Super Stripped Gapps
  9. Reboot
  10. Wait for the rom to boot completely
  11. Reboot again
  12. Enjoy

Congratzz now your device will be running on JB mini !!!!!!!!


SCREENSHOTS


Publisher: Unknown - 09:59

Wednesday, 19 June 2013

, , , ,

HOW TO GET HIGHER QUALITY VIDEO RECORDING IN MIRO/TIPO/J


By following the given steps you can improve the video recording quality of the listed phones

  • Xperia J
  • Xperia Tipo
  • Xperia Miro


REQUIREMENTS

1.Download this app 
   download


INSTRUCTIONS

1.Open the app then set the video recording settings by pressing the menu button.
Set it like this:
  • Scene mode: Sports (this is needed to get constant "60" FPS.)
  • Exposure compensation: anything above 0 (to brighten up the video.)
  • Video encoder: MPEG4
  • Video file format: MPEG4
  • Video bitrate: 100 Mbit (yes it wont be that high.)
  • Video framerate: 60 (if recording failed on J try using 25 FPS!!)

  • Audio encoder: AAC
  • Audio samplerate: 44100
  • Audio bitrate: 128000 / 160000 (there's not much diffrence there, but its your choice)

  • Tick the auto rotate video if you need it.

VIDEO WILL NOT LOOK GOOD ON DARK PLACES. NOISE IS EXPECTED.

SCREENSHOTS


Publisher: Unknown - 04:05

Saturday, 8 June 2013

, , ,

HOW TO ROOT TIPO & TIPO DUAL WITH NEW FIRMWARE


NOTE: If you just bought your phone and your firmware not yet upgraded or your phone already got firmware below 11.0.A.4.22(tipo) and 11.0.A.6.5(tipo dual), then you can skip to step 9


REQUIREMENTS

1. Flashtool – download
2. Firmware for Xperia Tipo – 11.0.A.0.16 (Old) << some people have sinheader problem  
    with this firmware) then try this >>11.0.A.0.16_world(Old) 11.0.A.4.22 (New) (You 
    need BOTH files unless your phone already rooted)
    Firmware for Xperia Tipo Dual – 11.0.A.1.12 (Old) & Loader  &11.0.A.6.5 (New) (You need 
    ALL files unless your phone already rooted)
3. Root with Restore – Download V18
4. Xperia Root – Download


If your phone already rooted, you can skip to (Flashing New Firmware part)

INSTRUCTIONS

1.  Open Flashtool  
2.  Enable debugging mode on your phone & enable unknown sources   
3.  Connect your device via USB,and select Tipo
4.  Click Flash icon (looks like thunder) and choose flashmode
5.  Then browse the folder where you save the Oldfirmware (.ftf) file (Make sure you put Old and 
      New firmware in different files). Flashtool will automatically scan files inside the firmware.
      For Tipo Dual make sure you extract loader and copy loader.sin file in the same folder  
      with old firmware(,tft).for New firmware no need of loader.sin
6.  Click OK
7.  Flashtool will ask you to disconnect your phone
     Disconnect your phone and shut it down
     Push Volume Down (-) button (dont release it) and connect the usb cable again
     Until Flashtool say your phone connected in flashmode then you can release the button
     Let it finish and turn on your phone (it takes awhile to turn on)
8.  Enable debugging mode on your phone (Setting>developer options) & enable unknown sources     
     (Setting>security)
9.  Extract Root with Restore by Bin4ry you downloaded before, and make a folder called root in 
     Drive C:  then copy all the stuffs extracted into the Root folder
10.Run Command Prompt as administrator (For Windows 7 search at start and right-click CMD run 
     Administrator/ For Windows 8 push button windows key + X then select command prompt (Admin))
11.Type cd c:\root
12.Type \stuff\adb devices
     If your device connected properly, it should be there (If you installed android emulators such as   
     Bluestacks/You wave,it wont work,you will have to uninstall them)
13.Next type runme
14.Green message will come out, type 1 then enter
15.A message will come out in your phone,Just select Restore My Data option
16.The Green command prompt will assist you, if the message stuck on Running for so long, mean you  
     fail to root. (Fail happened because you skipped step 1 or your firmware is new)

After finish, your phone will reboot and there will be new application installed called Super SU

Congratzzz you just rooted your phone!!!!!!!!


Flashing New Firmware

1  If your phone already rooted, you can skip to this step.
2. Now connect your phone again, make sure debugging mode and unknown sources enabled.
3. Extract Xperia root folder you downloaded before, open it up and double-click 01-local-prop.bat (dont  
    run as administrator) follow the instruction given.
4. Open Flashtool, click Flash button, choose flashmode then browse the folder where you save New 
    Firmware (.ftf) file.
    Make sure that you Uncheck wipe data!!!!
5. Click OK
6. Follow step 7(given above)
7. You will realize that Super Su have gone
8. Now connect your phone again, open Xperia root file, double-click 02-push-root-files (dont run as 
    administrator) follow the instruction given.

Your phone will reboot and there will be new app called  Superuser

 Congratzz you have Rooted your phone with the New Firmware!!!!!

Publisher: Unknown - 04:43