Wednesday 25 September 2013

, , ,

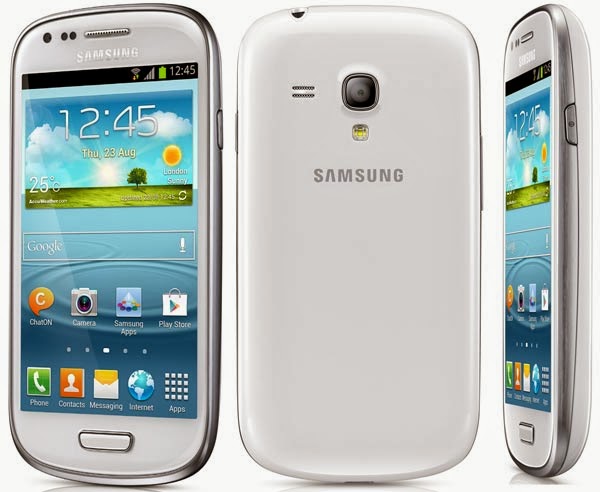
HOW TO ROOT SAMSUNG GALAXY S3 MINI


REQUIREMENTS

1. Install Galaxy S3 Mini I8190 USB drivers on your PC.
2. Enable USB Debugging on your phone (Settings > Applications > Development > USB debugging)
3. Take backups of your important data.
4. Make sure your device has at least 80% of charge.

INSTRUCTIONS


1.Download XXALJL Android 4.1.1 rooted firmware for Galaxy S3 Mini I8190.
2.Download Odin v3.07 From Here. Install Odin on your computer and extract the root file on the Desktop.
3.Now Turn Off your device and go to Download Mode by pressing and holding the Volume Down + Home Buttons together for few seconds followed by Power button until you see an Android logo on screen.
4.Now open ODIN on your computer and connect the device to your computer.
5.Once the phone is successfully connected to your PC, the ID:COM box on ODIN will turn yellow color and will show the COM port number.
6.Now Select the downloaded file to install by following below steps

  • Click on PDA and select file with HOME or CODE in its name.
  • Now click on Phone and select file with MODEM in its name.
  • Next click on CSC and select file with CSC in its name.
  • At last click on PIT and select file with .pit.

7.Again go to ODIN and check Auto Reboot and F. Reset Time options.
8.Now click on Start button in ODIN window to start the installation process. The process may take up several minutes to complete. So be patient.
9.When the installation is completed, your phone will restart automatically. Now you can unplug your device from the computer.

Congratzzzz!!!!You have successfully rooted your Galaxy S3 Mini!!!!!!!!
Publisher: Unknown - 09:50
, , ,

HOW TO ROOT SAMSUNG GALAXY TAB 2


REQUIREMENTS


1. Take backups of your important data.
2. Make sure your device have at least 80% battery power.
3. Enable the USB debugging option on your device by simply heading to Menu>>Settings>>Developer options>>USB debugging.
4. Download and install USB driver for Galaxy Tab 2 (7.0) in your PC.
5. Download the following files


INSTRUCTIONS


1. First extract CF-Auto-Root-espressorf-espressorfxx-gtp3100.zip on your desktop. You will get a file with .tar extension under extracted folder.
2. Extract the Odin zip file too and you will get Odin3 v3.07.exe along with other files.
3. Now switch off your device and reboot it into Download Mode by pressing and holding the Volume DOWN+Home+Power buttons together.
4. Run Odin3 v3.07.exe from the extracted folder as an Administrator because Admin privileges is required to complete the process.
5. Now connect the device via USB. A message will be displayed under Odin’s message box in the bottom left section saying “Added!!”.
6. Next click the PDA Button, and select the CF-Auto-Root-espressorf-espressorfxx-gtp3100.tar.md5 file. Make sure F. Reset Time and Auto Reboot checkboxes are selected.
7. If everything is OK, click on the START button to begin the flashing process.
8. Once the process completed, the tablet will reboot automatically and soon you will see a PASS message with green background in the left-most box at the very top of the Odin. Now you can disconnect your tablet from PC. This process may take some time. So, keep patience.

Congratzzzz!!!you have successfully rooted your Galaxy Tab 2!!!!!!!
Publisher: Unknown - 09:38

Tuesday 24 September 2013

,

HOW TO ROOT MICROMAX A110 CANVAS 2


REQUIREMENTS

1.Create backup of all the important data
2.Your device must have atleast 80% charge
3.Enable USB debugging(Settings > Applications > Development > USB debugging)

INSTRUCTIONS

  1. Now download the Rooting Tool to your computer. Once downloaded, extract it and open it.
  2. Connect the device via USB. The drivers will be installed automatically.
  3. Next open the extracted folder and click on the Runme.bat file.
  4. Then double click on the file a tool window will popup immediately
  5. There you will find 3 options Normal, Special and Unroot
  6. Now select “1” by entering 1 in the command prompt window and press Enter to confirm the choice.
  7. Once you pressed the “Enter”, the rooting process will start immediately.
  8. The process may take around 5- 10 minutes
  9. Once it is completed, you will see an onscreen message that the Rooting has been completed successfully.

Congratzz!!!you have successfully rooted your Micromax canvas 2!!!!!!!!!
Publisher: Unknown - 10:35

Sunday 22 September 2013

, , ,

HOW TO ROOT MICROMAX A89 NINJA


REQUIREMENTS

1. Don’t forget to take backups of your important data.
2. Make sure your device has at least 80% of phone battery charge.
3. Enable USB Debugging on your device (Settings > Applications > Development > USB             debugging)
4. Install Micromax A89 USB drivers on your pc from here.
5. Download Bin4ry file to Root Micromax A89 Ninja.

INSTRUCTIONS


1. Download and extract the Root Package archive.
2. Now, open “Runme.bat” file from the extracted folder.
3. Connect the device to your computer via USB cable. The drivers will be 
     installed automatically.
4. Now double click on the “Runme.bat” file, a tool window will popup immediately.
5. There you will find 3 options Normal, Special and Unroot
6. Select “1” by entering 1 in the command prompt window and then press Enter to confirm 
    the choice.
7. The rooting process will start immediately after pressed the Enter key. The process may 
    take around 5-10 minutes to complete.

Congratzzz!!!!! Now you have successfully rooted your Micromax A89!!!!!!!!!!!!!!!!!!!
Publisher: Unknown - 22:50

Saturday 21 September 2013

, , ,

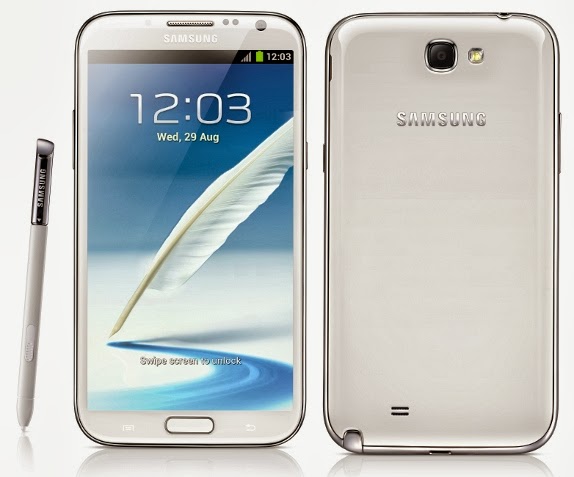
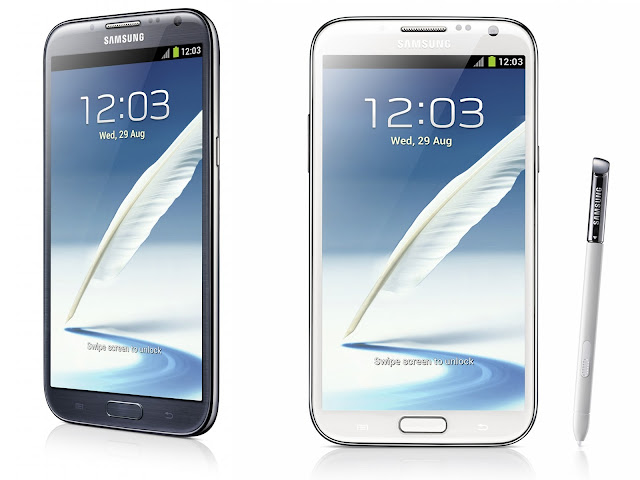
HOW TO ROOT SAMSUNG GALAXY NOTE 2 ON ANDROID 4.1.2


REQUIREMENTS

1. First of all make sure that you installed USB drivers for Samsung Galaxy Note 2 on your             Computer. here.
2. Your device must have minimum 80% battery charge.

INSTRUCTIONS


  1. Download the Firmware here and extract it.
  2. Now Download Odin3_v3.04.zip and extract it
  3. Next turn on USB Debugging from Settings > Applications > Development > USB debugging options.
  4. Turn off your Galaxy Note 2 and boot it into Download Mode: press and hold Volume Down and Home  keys simultaneously
  5. Then long press the Power key till you see a screen that prompts you to press the Volume Up key to continue.
  6. Press the Volume Up key to enter the Download Mode.
  7. Now open the Odin folder and run the .exe file present there.
  8. Connect your Galaxy Note 2 with the Computer via USB while Odin is open
  9. Make sure that only F. Reset Time and Auto Reboot boxes are checked on Odin. Do NOT check any other item.
  10. Now click on the PDA button and select the CF-Auto-Root-t03g-t03gxx-gtn7100.zip.tar  file.
  11. Then, click on Start button to start the installation process and this process will take around 6-7 minutes to complete
  12. Finally, you will see a PASS! message on the ID:COM box and then the device will reboot automatically.

Congratzz you have successfully rooted your Galaxy Note 2!!!!!!!!!!!!!
Publisher: Unknown - 00:11

Friday 20 September 2013

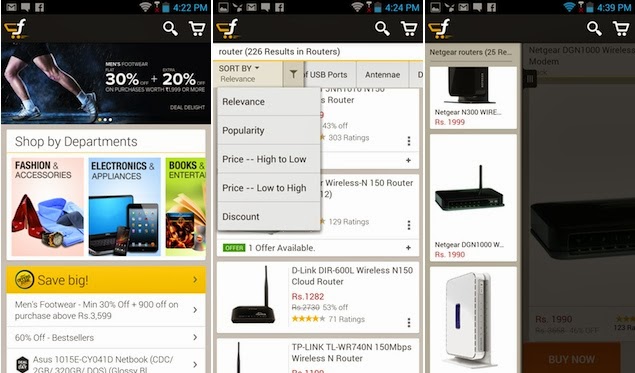
FLIPKART RELEASES SHOPPING APP FOR ANDROID


Flipkart, one of the leading e-commerce platform in India has finally launched an Android app that offers users the ability to browse and purchase from the online shopping website's product catalogue from their smartphones. The app also offers voice search and barcode scanning to check for products, share the details with others and also add a widget to the homescreen. Flipkart launched eBooks app for Android last year. The app was released for iPhone, iPad and Windows Phone 8 devices last month. The Flipkart app would be available for other platforms soon. Flipkart also has a mobile site Flipkart Lite.
Features of Flipkart app for Android
  • Fast and easy shopping – smooth experience with respect to overall speed, discovery, decision making and transaction
  • Check prices instantly on Flipkart.com using voice search and barcode scanning
  • Get quick accessibility to products that you have already viewed (check prices, check product specs etc.) even when not connected to the network.
  • Share product information with friends easily through call, sms, emails, social media – without exiting the app.
  • App widget showcases/highlights the sites’ top offers on your home screen
Download Flipkart (Free) – Android
Publisher: Unknown - 23:43

Thursday 19 September 2013

,

OFFICIAL SPECS OF THE JOLLA PHONE

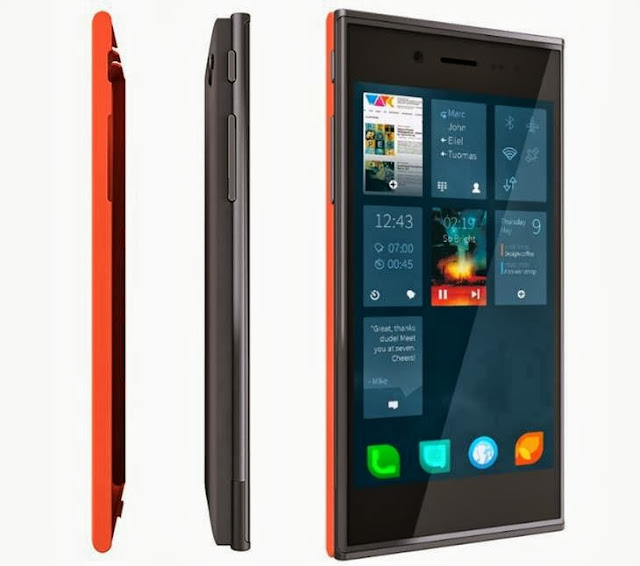
Ever since Jolla announced its first-generation smartphone, which was simply called Jolla, it has created a buzz among people with its simplicity. Back then, the company did not announce the specifications of the device,Just as Antti Saarnio did promise Jolla revealed more specifications of Jolla Phone alongside with second pre-order campaign for Finland. So lets look what hardware will power the new upcoming OS.


Display
The screen will be 4.5” Estrade display, which isqHD (Quarter-HD) and that is 960 x 540 pixels. It may have 244.77 PPI pixel density,
Camera
This beauty comes with a  8MP AutoFocus camera .There will also be single LED flash on the backand the front facing camera which will be 2MP.
Processor
Jolla Phone will be powered with Qualcomm Snapdragon Dual-Core which is clocked on 1.4GHz.
Memory
Sailfish OS and apps should work smoothly on 1GB of RAM memory. For storage there is 16GB internal storage which is expandable via MicroSD cards.
Battery
The juice for this device will be provided  by a 2100mAh, 3.8V, 7.98Wh battery which is user removable.
Other known features from before and include LTE connectivity, 3.5MM audio jack, MicroUSB port.

Pricing

The device is currently priced at €399 (about $540) and the company hopes to start shipping the device by the end of the year

Publisher: Unknown - 20:49

Wednesday 18 September 2013

, , ,

HOW TO OVERCLOCK SAMSUNG GALAXY NOTE 2


REQUIREMENTS


INSTRUCTIONS


  1. Run Odin
  2. Download the Note2 Core kernel
  3. Turn off your phone and put it into download mode.To do that press and hold the Volume Down +Home+ Power key till the screen turns on.Then press Volume up to enter into download mode
  4. Make sure your device is detected by Odin and then click on PDA
  5. Once you clicked PDA find the Note2 Core kernel file
  6. Press enter and Flash the file
  7. Your device will now reboot and you can use SetCPU to ensure that you are overclocked


Publisher: Unknown - 23:33
,

HOW TO FIX FIRMWARE UPGRADE ENCOUNTERED AN ISSUE


Even when installing the official firmware using Odin or receiving the latest updates via Kies or OTA on your galaxy phone may get you in to a bricked situation.Most of them end up with this message on the screen.


Now follow the steps given below to get out of the error and get your device into normal condition

INSTRUCTIONS

  1. Download and install Samsung Kies in your computer if you don't have it
  2. Note down your phones serial number.You can find it under the battery or the box with which the device came.
  3. Launch Kies  and click Tools>Firmware upgrade initialization 
  4. Connect your device via USB
  5. Enter your device model name in CAPS(eg: GT 19500) and click OK
  6. Then you will asked to enter the serial number of your device and click OK
  7. This will force Kies to download the required firmware upgrade for your device
  8. Respond and confirm all security warnings to clear the way for emergency firmware installation and then select start upgrade
  9. Kies will now start downloading the firmware and this will take several minutes depending on data connection 
  10. When it is finished,new firmware will be installed in your device
  11. Click OK and disconnect your device
  12. Reboot your device and its done :)


Publisher: Unknown - 23:14
,

THE NEW BLACKBERRY Z30


BlackBerry has just announced the Z30 - the smartphone with the largest touchscreen it has ever put into production. Moreover, the Z30 packs the company's latest version of BB 10 OS.


The BlackBerry Z30 has  a 5" Super AMOLED display with a resolution of 1280 x 720 pixels. This makes the pixel density meter stop at 295 ppi.
The Z30 is powered by a dual-core 1.7GHz Snapdragon S4 Pro chipset and 2GB of RAM.
And all of this is powered by  a 2,880mAh battery and measures 140.7 x 72 x 9.4mm. The larger battery found in the Z30 hasn't made it much thicker than the Z10 - the difference is just 0.1mm. The BlackBerry Z30 supports LTE as well as dual-band Wi-Fi 80211 a/b./g/n, Bluetooth 4.0 and NFC.
Z30 has a rear 8MP camera with an f/2.2 lens and 1080p video recording capabilities. Video chatting has been taken care of with an 2MP front-facing snapper, which records 720p video
The BlackBerry Z30 runs BB 10 OS version 10.2 out of the box. It brings some improvements to the BlackBerry ecosystem including BB Priority Hub, message previews in the lockscreen as well as Wi-Fi Direct support, multiple alarms and standard Unicode emojis.
BlackBerry hasn't specified any pricing or availability information just yet, but the Z30 is expected to hit the UK as early as next week.
Publisher: Unknown - 22:37