Friday 31 May 2013

, , ,

OVERCLOCK XPERIA J UPTO 1.3GHZ


With this method you can overclock your Xperia J upto 1.3ghz!!!!!!!!!!!!!!!!!!!!!!!!!!!!

Disclaimer
  • You may void your warranty.
  • I am not responsible for bricked devices or dead SD cards.


REQUIREMENTS

1.Unlocked bootloader
   unlock
2.Flashtool
   download
3.Kernal
   download


INSTRUCTIONS

  1. open flashtool and add your device.follow the link here
  2. Connect your device in fastboot
  3. click on fastboot mode.
  4. in fastboot windows click ''Slelect kernal to flash''
  5. now navigate to your kernal
  6. flash will start


Congratzzz  now your Xperia j can be overclocked upto 1.3ghz!!!!!!!!!!!!!
Publisher: Unknown - 21:48

Thursday 30 May 2013

, ,

NEW UPDATE FOR XPERIA J 11.2.A.0.31

               11.2.A.0.31 UPDATE FOR XPERIA J


You may already have the latest software, depending on the date of purchase. Software updates are released at different times depending on operator and country. Therefore, we cannot give you an exact date for when a specific update will be available for your phone.
Android version: Google Android 4.1 (Jelly Bean)
Latest available software: 11.2.A.0.31
Release date: 2013-05-29
To find your device’s current software version:
Settings > About phone > Build number / version
Included in this software
There are many new features in this upgrade for your Xperia™ smartphone, some examples are:
  • Extended Standby to improve battery time. (This feature saves battery by preventing data traffic when the screen is off)
  • Easier access to commonly used settings with Quick settings with notification bar
  • Sony Select is a new service (replacing “Recommender”) that recommends apps, games and music.
REQUIREMENTS

1.Internet Connection
2.PC Companion
3.USB Cable

HOW TO UPDATE

1.Update your phone with the help of PC Companion
2.Connect your phone via USB Cable and open PC Companion


3.You will see the above window,just click on update and your phone will be updated


congratzzz now your phone is updated with the latest firmware 11.2.A.0.31
Publisher: Unknown - 20:56

Tuesday 28 May 2013

, , ,

UNLOCKING BOOTLOADER ON SONY LIVE WITH WALKMAN


Now i am going to show you an easy way to unlock the bootloader on Sony Live with Walkman.

Disclaimer:Unlocking the bootloader on your phone voids the warranty keep that in mind

Before you proceeding further you should check whether your phone ins unlockable

First, you should confirm that it is possible to unlock the boot loader of your device by checking the service menu. In your device, open the dialler and enter *#*#7378423#*#* to access the service menu
In your device, tap Service info > Configuration > Rooting Status. If Bootloader unlock allowed says Yes, then you can continue with the next step. If it says No, or if the status is missing, your device cannot be unlocked.

REQUIREMENTS

1. Flashtool
    download
2. Bootloader unlock key (you can get it from official Sony website here )

INSTRUCTIONS

1.Install Flashtool
2.Go to the folder where you installed flashtool,Select drivers folder and install the ADB drivers
3.Switch off your phone
4.Hold the volume down key  and at the same time connect the USB
5.In Flashtool,select plugins>Bootloader unlock>Run
6.Now you can see your IMEI number contain window
7.Now copy the unlock key and click on unlock bootloader

Congratzzz you have unlocked the bootloader on your device.To confirm it type *#*#7378423#*#*
go to service>configuration,If it displays Bootloader unlock:Yes 

your device is unlocked!!!!!!!!!!!!!!!!!!!!


Publisher: Unknown - 10:25
, , ,

ROOTING SONY ERICSSON LIVE WITH WALKMAN


The Sony Ericsson Live with Walkman is an Android smartphone from Sony Ericsson. It is a music-focused smart phone running Android 2.3 powered by a 1 GHz processor. The screen is 3.2" TFT with HVGA resolution and scratch-resistant coating. The phone measures 56.5 x 106 x 14.2 mm and weighs 115g, making it slightly taller and heavier than the Xperia mini but its specs are pretty much like that.

Now i well tell you how to root this phone!!!!!!

Make sure you have done the following

1.atleast 70% charge on your battery so that it wont turn during middle of the process
2.Enable USB debugging
3.Unlocked bootloader
4.Backed up your data

REQUIREMENTS

1.Flashtool
   download
2.USB Cable
3.Firmware WT19i_4.0.2.A.0.58 
   download

INSTRUCTIONS
  1. You will also need to install these too                                                                                         Doom lord rooting kit ( download) and CWM Recovery image (download).
  2. Install Flashtool on your computer.
  3. Then, unzip the firmware, you will get the .ftf file. Go and place it to the “C:/Drive > flashtool > firmwares>”.
  4. Connect your device via USB
  5. Open flash tool, select flash mode.
  6. From the list that opens select “Wipe User Data” and “Wipe Cache” and click “ok”.
  7. In the end the handset will reboot.
  8. Turn it off and reboot by pressing volume -, home and power button.
  9. Flash the firmware with flashing tool.
  10. Go to your PC and extract the Doomlord root kit.
  11. Run the runme.bat 
  12. You can update your phone from “Settings -> About Phone”; don’t do it using PC companion
  13. When the update operation is finished, go to the PC and extract CWM.
  14. Install and then run the second file script: wt19i.install-cmw2.cmd.
  15. Make sure USB debugging mode enabled


Congratzzzz you have rooted your Sony live with walkman.Now you can install custom roms and completely customize your phone
Publisher: Unknown - 09:58

Monday 27 May 2013

, ,

HOW TO INSTALL CWM IN SAMSUNG GALAXY ACE S5830


This procedure is to install Clockwork mod in your device so that you can install Custom Roms in the future

Make sure you do the following 

1.Atleast 60% power in your battery
2.Be sure to back up your data


REQUIREMENTS
  1. Download the CWM  download.
  2. USB cable


INSTRUCTIONS
  1. Now connect your phone via USB.
  2. Now, copy the CWM file in to your phone’s SD card.
  3. Disconnect the USB
  4. Switch off your phone
  5. To Reboot in recovery: press and hold the Power and Home buttons.
  6. From recovery select “install zip from SD card” followed by “choose zip from SD card”.
  7. Pick the downloaded file from the SD card and start the flashing process.
  8. Don’t make any other changes.
  9. In the end select “+++go back+++” and “reboot system now”.

Congratzzz now your Samsung Galaxy Ace S5830 has CWM installed in it,now you can go and install Custom Rom for your device
Publisher: Unknown - 04:12
, , ,

UPDATE SAMSUNG ACE PLUS S7500 TO JELLYBEAN 4.2.1


Samsung Galaxy Ace Plus S7500 won’t seeing any official Android 4.1 Jelly Bean ever due to it low spec ends
To update Samsung Galaxy Ace Plus S7500 to Android 4.1.2 Jellybean, follow the instructions given below
Make sure you have done the following
2. Make sure your device have at least 80% battery power.so that it wont power off during     
    middle of the process
3. You must have ClockworkMod Recovery installed on your device.
4. Enable USB Debugging
REQUIREMENTS
1. Jelly Bean 4.1.2-Samsung Ace Plus S7500
    download
2. Google Apps if required
STEPS
1.  Connect your phone to PC via USB cable.
2. Copythe downloaded files to the SD card
3. Disconnect USB
4. Turn off your phone
5. Now Boot into recovery by pressing and holding Volume -, Home and Power buttons
6. Wipe the Data and Dalvic Cache or you might brick your device afterwards
7. Select install zip from sdcard, then select choose zip from sdcard. (Now, locate the file)
8. After the ROM installation process end, repeat the step 7 but choose gapp's zip file  to install the google apps package.
9. When the installation is completed, go back to the main recovery menu and select reboot

Congratzzzz now your  Samsung Galaxy Ace Plus S7500 is running on Android 4.1.2 Jelly Bean firmware based custom rom
Publisher: Unknown - 03:48
, , ,

UPDATE SAMSUNG GALAXY ACE S5830 TO JELLYBEAN 4.1.2

Samsung Galaxy Ace GT-S5830 won’t seeing any official Android 4.1 Jelly Bean ever due to it low spec ends
To update Samsung Galaxy Ace GT-S5830 to Android 4.1.2 Jellybean, follow the instructions given below
Make sure you have done the following
2. Make sure your device have at least 80% battery power.so that it wont power off during     
    middle of the process
3. You must have ClockworkMod Recovery installed on your device.
4. Enable USB Debugging
REQUIREMENTS
1. Jelly Bean 4.1.2-Samsung Ace s583
    download
2. Google Apps if required
STEPS
1.  Connect your phone to PC via USB cable.
2. Copythe downloaded files to the SD card
3. Disconnect USB
4. Turn off your phone
5. Now Boot into recovery by pressing and holding Volume -, Home and Power buttons
6. Wipe the Data and Dalvic Cache or you might brick your device afterwards
7. Select install zip from sdcard, then select choose zip from sdcard. (Now, locate the file)
8. After the ROM installation process end, repeat the step 7 but choose gapp's zip file  to install the google apps package.
9. When the installation is completed, go back to the main recovery menu and select reboot

Congratzzzz now your  Samsung Galaxy Ace S5830 is running on Android 4.1.2 Jelly Bean firmware based custom rom
Publisher: Unknown - 03:39

Sunday 26 May 2013

, , ,

ROOTING XPERIA RAY WITH ICS 4.0.3 KERNEL


In this post i am gonna show you how to root Xperia Ray ST18i ICS 4.0.3 Firmware  with the use of DooMLoRD Toolkit.


REQUIREMENTS
1.Flashtool 
   download.
2.ICS 4.0.3 Firmware
  download.
3.USB Cable
4.Unlocked Bootloader

Make sure have you have enabled USB debugging enabled before following the instructions


Instructions
  • Download Flashtool & ICS 4.0.3 Firmware (4.1.A.0.562) Mentioned Above
  • Install Flashtool
  • Extract Xperia Ray ICS4.0.4 FirmwarePackage in Your PC, You’ll Get .ftf  File
  • Navigate C: –> flashtool –> firmwares Directory.Delete All The Data in That Directory If It is Present Over There.
  • Copy/Move The Extracted Firmware Package File (.ftf File) In The C: –> flashtool –>firmwares Directory.
  • Open Xperia Flashtool
  • You’ll Be Ask To Select Either Flash Mode Or Fastboot Mode.Select Flash Mode & Press Ok.
  • After Selecting Flash Mode, Firmware Selection Window Will Appear.In The Left Side Select ST18i (Version 4.1.A.0.562).
  • In The Right Side, Tick The Following 3 Options Only.
  1. Exclude system
  2. Exclude baseband
  3. Exclude Fota
  • Press ok. Wait for Flashtool to prepare.now it will ask you to connect your mobile, follow the instructions given carefully & connect your phone.(While connecting the device to the computer, turn off your Xperia Ray. press & hold the volume down button. now connect It to the PC).
  • As Ssoon as connect your device to PC, Flashing process should now start.once you see the Flashing finished message In Flashtool. 
  • Disconnect the device from PC & wait for It to reboot.
  • After device gets rebooted, again connect It to the PC.Before connecting to the PC ensure that you’ve Install ADB Drivers.If tou have not Installed It yet, Click here to download  (ADB Drivers are Installed along with flashtool, fownload It just in case If you want reinstall them).

Now lets get to the Rooting part
  • Download rooting package for your device from the link given ---> download.
  • Extract it in your computer
  • Simply Run runme.bat file & follow the onscreen tnstructions given over there.
  • In this process the device will reboot couple of times.when the code finishes It will show “ALL DONE”.
  • Now Again Flash Kernel From ICS 4.0.4 Firmware By Following The Method Given Above


Congratzzz you have  rooted your Sony Xperia Ray running latest Firmware update of ICS 4.0.4 (4.1.B.0.431). !!!!!!!!!!
Publisher: Unknown - 03:24
,

MANUALLY UPDATING FROM ICS TO JB IN XPERIA DEVICES

UPGRADE TO JELLY BEAN


There is no need to take your phone to service centre for upgrading your phone's OS from Icecream Sandwich to Jelly Bean.You can easily do this at your home with the help of Sony PC Companion.

REQUIREMENTS
1.Internet Connection
2.USB Cable
3.Sony PC Companion
download

SONY PC COMPANION


PC Companion is a collection of tools and applications you can use when you connect your device to a computer.
PC Companion contains Xperia™ Transfer, a tool for moving content from an iPhone to your new Xperia™ device. PC Companion also offers device software updates, contacts and calendar management, and a backup and restore feature for your phone content (availability of applications depends on your phone and operator). You can also transfer and organize your media content using Media Go. Over time, more applications can be added and downloaded when made available by Sony or your operator.

System requirements:
  • Internet broadband connection
  • Intel® Pentium® 4, 3.6 GHz or equivalent AMD processor
  • 500 MB free hard disk space
  • 2 GB RAM
  • 1 available USB 2.0 port and USB cable
  • Microsoft® Windows XP™ SP2 (32 bit), Vista (32/64 bit) or Windows 7 (32/64 bit) or Windows 8 (32/64 bit)*
  • *PC Companion is not supported on Windows RT
Installation instructions:
  1. Download the installation package to a temporary folder on your PC.
  2. Run the downloaded file, and follow the instructions that appear.
Supported Products:
  • Xperia L
  • Xperia SP
  • Xperia E
  • Xperia ZL
  • Xperia Z
  • Xperia E dual
  • Xperia V
  • Xperia J
  • Xperia TX
  • Xperia T
  • Xperia miro
  • Xperia tipo dual
  • Xperia SL
  • Xperia tipo
  • Xperia ion HSPA
  • Xperia acro S
  • Xperia go
  • Xperia neo L
  • Xperia ion LTE
  • Xperia P
  • Xperia U
  • Xperia sola
  • Xperia S
  • Live with Walkman
  • Xperia pro
  • Xperia neo V
  • Sony Ericsson txt
  • Xperia active
  • Xperia arc S
  • Xperia ray
  • Mix Walkman phone
  • Xperia mini
  • Sony Ericsson txt pro
  • Xperia PLAY
  • Xperia neo
  • Xperia arc


INSTRUCTIONS TO UPDATE

1.Install PC Companion
2.Connect your device via USB cable
3.Open PC Companion


 you will see that software update is available to your device,just click on update and follow the instruction your phone will get updated

NOTE:Only those devices which have an update available can be upgraded to JellyBean 


Publisher: Unknown - 02:12

Saturday 25 May 2013

, ,

EASY ROOTING TOOL KIT

This is an easy tool kit that has developed by the XDA member Doomlord for easy rooting

There have now been nearly 440,000 downloads of this easy rooting toolkit for various devices (see list here), and many more if you include variations/different translations, etc that use it. 


Download
DooMLoRD_v4_ROOT <NEW>


DooMLoRD_v3_ROOT


DooMLoRD_v2_ROOT


DooMLoRD_v1_ROOT


INSTRUCTIONS

1.just download the attached file, extract it using winzip/winrar

2.go to the folder where its extracted and execute "RUNME.bat"

3.read and follow the instructions on the screen!

Code:
 ---------------------------------------------------------------
               Easy rooting toolkit (v4.0)
                    created by DooMLoRD
         using exploit zergRush (Revolutionary Team)
    Credits go to all those involved in making this possible!
 ---------------------------------------------------------------

[*] This script will:
      (1) root ur device using latest zergRush exploit (16 Nov)
      (2) install Busybox (1.18.4)
      (3) install SU files (binary: 3.0.3 and apk: 3.0.6)
  
[*] Before u begin:   
      (1) make sure u have installed adb drivers for ur device
      (2) enable "USB DEBUGGING" 
            from (Menu\Settings\Applications\Development)
      (3) enable "UNKNOWN SOURCES"
            from (Menu\Settings\Applications)
      (4) [OPTIONAL] increase screen timeout to 10 minutes
      (5) connect USB cable to PHONE and then connect to PC

Tested and working on Devices

  • Sony Xperia X10 (GB firmware)
  • Sony Xperia Arc
  • Sony Xperia Arc S
  • Sony Xperia Play [R800i/R800x]
  • Sony Xperia Ray
  • Sony Xperia Neo
  • Sony Xperia Neo V
  • Sony Xperia Mini
  • Sony Xperia Mini S51SE
  • Sony Xperia Mini Pro
  • Sony Xperia Pro
  • Sony Xperia Active
  • Sony Xperia Live Walkman
  • NTT Docomo Xperia ARCO SO-02C
  • Samsung Galaxy S2 [GT-i9100/i9100P/i9100T]
  • Samsung Galaxy S II for T-Mobile (SGH-T989)
  • Samsung Galaxy S II for AT&T (SGH-I777), Skyrocket (SGH-i727)
  • Samsung Galaxy S II LTE Rogers Canada (SGH-I727R), Android version 2.3.5, Baseband version I727RUXKJ7
  • Samsung Galaxy S II Epic 4g Touch
  • Samsung Galaxy S2 HD LTE (SHV-E120S)(korea)
  • Samsung Galaxy S2 LTE (SHV-E110S)
  • Samsung Galaxy S2 LTE Japanese version (carrier DoCoMo) [SC-03D] (2.3.6) {OMKK3}
  • Samsung Galaxy i9100G
  • Samsung Galaxy S [i9000B] & [i9000 2.3.3 (PDA I9000BOJV8, Phone I9000XXJVO, CSC I9000GDTMJV7) and german T-Mobile branding], XWJVW (2.3.6)
  • Samsung Galaxy S 4G (aka SGH-T959V)
  • Samsung Galaxy S Plus (GT-I9001) OS 2.3.3 and 2.3.6 (I9001ZSKP6) & 2.3.4 firmware (i9001XXKP4)
  • Samsung Galaxy Mini GT-S5570 (GB only)
  • Samsung Galaxy Mini Pro i5510
  • Samsung Galaxy W [i8150]
  • Samsung Galaxy Y
  • Samsung Galaxy Y pro [B5510] (2.3.5)
  • Samsung Galaxy Tab [P1000] (2.3.3 firmware), [P1000N]
  • Samsung Galaxy Note [N7000]
  • Samsung Galaxy Player YP-G70 2.3.5 (GINGERBREAD.XXKPF)
  • Samsung Galaxy Ace (2.3.3, 2.3.4 firmware)
  • Samsung S5670 FIT DDKQ5 2.3.5
  • Samsung Nexus S [i9023] (2.3.6)
  • Samsung Nexus S 4G 2.3.7
  • Samsung Galaxy Nexus S [i9020] (2.3.6) & Nexus S i9020A (2.3.6)
  • Samsung Exhibit (SGH-T759)
  • Samsung Exhibit 4G (SGH-T759) (2.3.3) Build UVKE8
  • Samsung Epic 4G
  • Samsung Captivate i897 UCKH3
  • Motorola ATRIX
  • Motorola Milestone 3 [ME863 HK]
  • Motorola Milestone 2 with Gingerbread
  • Motorola XT860, Bell XT860
  • Motorola Defy+
  • Motorola Droid X sys ver 4.5.605 w/ gingerbread
  • Motorola Droid X2 (2.3.4) Sys ver 1.3.380.MB870.Verizon.en.US Build 4.5.1A-DTN-150-30
  • Motorola XT883 (China Telecom)
  • Motorola XT862 (Verizon Droid3)
  • Motorola DROID RAZR
  • Nexus One (2.3.6 stock)
  • LG Revolution
  • LG Nitro HD
  • Vizio VTAB1008 Tablet
  • Huawei Ideos U8150 (2.2)
  • Huawei Ideos X5 [U8800] (2.3.5)
  • HTC Sensation (S-OFF only)
  • HTC Raider (Rogers)
  • HTC Chacha
  • Acer Liquid Mini (2.3.5)
  • Acer Liquid Metal (2.3.6)


I don't take credit for this work all the credit goes to Doomlord from the XDA i am just sharing this incredible rooting toolkit made by him,so that everyone can use it to root their devices with ease!!!!
Publisher: Unknown - 04:54
,

ROOTING WITH UNLOCKROOT


 UNLOCKROOT


UNLOCKROOT: is a software developed from the XDA guyz  to help beginners with rooting their android devices.Now you can root your phone with just one click.

If this method didnt work just follow the other method i posted
This program have been modified to work with newest firmware (so no need to downgrade!)

Xperia Miro 11.0.A.5.5
Xperia Tipo 11.0.A.4.22
Xperia Tipo Dual 11.0.A.6.5
Xperia J 11.0.A.7.5

Requirements


UnlockRoot – Download credit to SGYAndroid110212 XDA
(May not compatible with Windows 8)

Instruction

1.Make sure you have Sony PC companion installed. Extract unlockroot.rar and run unlockroot.exe as administrator
2.Enable debugging mode on your phone (Setting>developer options) & enable unknown sources (Setting>security) then connect your phone
3.Wait until your phone detected, then click Root button. Wait until finish and follow instruction to reboot.


Congratzzz you just rooted your phone!!!!!


Again… If this method not working for you.. then use the other method HERE

Publisher: Unknown - 02:34
, , ,

ROOTING XPERIA J WITH NEW FIRMWARE & LOCKED BOOTLOADER


If you have problem rooting your Xperia J with New Firmware… Then you should try this method which do not need to Unlocked Bootloader
If you just bought your phone and your firmware not yet upgraded or your phone already got firmware below 11.0.A.7.5, then you can skip to step 3..

REQUIREMENTS

1. Flashtool – download
2. Firmware for Xperia SL – 11.0.A.3.28 (Old) & 11.0.A.7.5 (New) (You need both files unless your 
    phone already rooted)
3. Root with Restore – Download V18 credit to Bin4ry Xda
4. Xperia Root – Download credit to Puppet13th Xda
5. Xperia J driver – Download credit to Kishenpj21 XDA
   
If your phone already rooted, you can skip to (Flashing New Firmware part)

INSTRUCTIONS

1.  Install Flashtool then extract Xperia J Driver (ST26.rar) and copy the ST26.ftd file to        
     c:\Flashtool\devices\
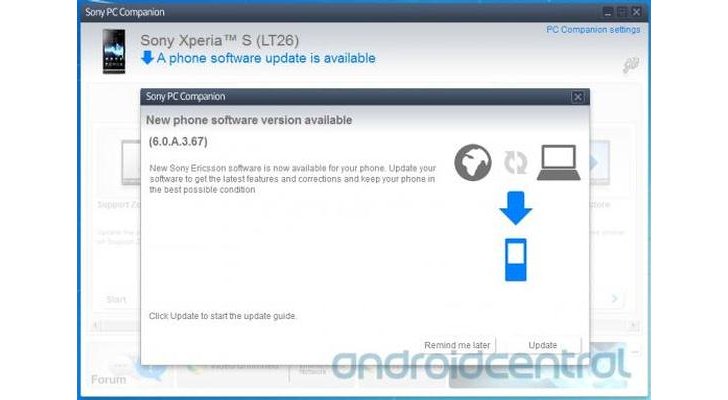
2.  Open Flashtool ,If you have already installed Sony PC Companion Flashtool will detect your device. Go  
     to devices>import and choose Xperia J, wait import to success
     Before that make sure that you have done the following
     Enable debugging mode on your phone (Setting>developer options) & enable unknown sources   
     (Setting>security)
3.  Connect your phone with usb,and select Xperia J
4.  Click Flash icon (looks like thunder) and choose flashmode
5.  Then browse the folder where you save the Oldfirmware (.ftf) file (Make sure you put Old and New 
     firmware in different files). Flashtool will automatically scan files inside the firmware.
6.  Click OK
7.  Flashtool will ask you to disconnect your phone
     Disconnect your phone and shut it down
     Push Volume Down (-) button (dont release it) and connect the usb cable again
     Until Flashtool say your phone connected in flashmode then you can release the button
     Let it finish and turn on your phone (it takes awhile to turn on)
8.  Enable debugging mode on your phone (Setting>developer options) & enable unknown sources     
     (Setting>security)
9.  Extract Root with Restore by Bin4ry you downloaded before, and make a folder called root in Drive C:  
     then copy all the stuffs extracted into the Root folder
10.Run Command Prompt as administrator (For Windows 7 search at start and right-click CMD run Administrator/ For Windows 8 push button windows key + X then select command prompt (Admin))
11.Type cd c:\root
12.Type \stuff\adb devices
     If your device connected properly, it should be there (If you installed android emulators such as   
     Bluestacks/You wave,it wont work,you will have to uninstall them)
13.Next type runme
14.Green message will come out, type 1 then enter
15.A message will come out in your phone,Just select Restore My Data option
16.The Green command prompt will assist you, if the message stuck on Running for so long, mean you fail to 
     root. (Fail happened because you skipped step 1 or your firmware is new)

After finish, your phone will reboot and there will be new application installed called Super SU

Congratzzz you just rooted your phone!!!!!!!!


Flashing New Firmware


1  If your phone already rooted, you can skip to this step.
2. Now connect your phone again, make sure debugging mode and unknown sources enabled.
3. Extract Xperia root folder you downloaded before, open it up and double-click 01-local-prop.bat (dont  
    run as administrator) follow the instruction given.
4. Open Flashtool, click Flash button, choose flashmode then browse the folder where you save New 
    Firmware (.ftf) file.
    Make sure that you Uncheck wipe data!!!!
5. Click OK
6. Follow step 7(given above)
7. You will realize that Super Su have gone
8. Now connect your phone again, open Xperia root file, double-click 02-push-root-files (dont run as 
    administrator) follow the instruction given.

Your phone will reboot and there will be new app called  Superuser

 Congratzz you have Rooted your phone with the New Firmware!!!!!

Publisher: Unknown - 02:06